

Fashion draping on dress form is the process of arranging fabric directly on a three-dimensional body form to develop the shape of a garment. Instead of beginning only with measurements and a flat paper pattern, the designer places fabric on the form, pins it carefully and adjusts it until the desired silhouette starts to appear.
For fashion students, draping is where fabric stops being a flat textile and begins to look like clothing. A sketch may show a beautiful neckline or flowing skirt, but draping helps students understand whether that idea can actually work with the chosen fabric.
The process develops observation, patience and control. Students learn how grain direction, fabric weight, balance, volume and body proportions affect a garment.
Draping can look effortless when performed by an experienced designer. In reality, every fold has a reason, every pin has a job, and one careless pull can make the entire garment lean to one side.
What Is Fashion Draping?
Fashion draping is a garment-development method in which fabric is shaped directly on a dress form. A designer uses fabric, pins, marking tools and reference lines to create garment sections such as a bodice, skirt, neckline, sleeve or decorative feature.
Once the desired shape is achieved, the important lines and points are marked. The fabric may then be removed from the form and converted into a flat pattern for further correction and garment construction.
Draping helps students understand a design in three dimensions. They can see how the fabric sits around the bust, waist and hip instead of trying to imagine the result entirely from a two-dimensional drawing.
It is especially useful when developing:
- Softly gathered garments
- Asymmetrical designs
- Cowls and flowing necklines
- Pleated styles
- Sculptural silhouettes
- Bias-cut garments
- Experimental shapes
- Eveningwear and occasionwear
- Designs with unusual volume
Draping is not limited to dramatic runway garments. Basic bodices, skirts and fitted styles can also be developed through this method.
What Is a Dress Form?
A dress form is a three-dimensional representation of the human torso used for designing, fitting and displaying garments. It provides a stable surface on which students can pin and shape fabric.
Unlike a display mannequin, a professional dress form is intended for garment work. Its surface allows pins to be inserted, while visible or applied guide lines help the student understand important body positions.
Common reference areas include:
- Centre front
- Centre back
- Bust line
- Waistline
- Hip line
- Side seam
- Shoulder line
- Neckline
- Armhole
- Princess line
These lines act like a map. Without them, a student may create an attractive shape that is slightly twisted or unbalanced.
The form should also match the intended garment size as closely as the project requires. Draping on an unsuitable form can create fitting differences when the garment is later developed for an actual wearer.
A dress form remains completely still and never complains about pins, which makes it a patient first fitting partner. However, it cannot explain whether a garment feels comfortable. Final fitting on a person or appropriate fit model is still important.
Why Fashion Students Learn Draping
Draping teaches students to think through fabric rather than treating fabric as the final step after drawing.
A garment sketch communicates an idea. A pattern provides measured shapes. Draping connects those stages by showing how material behaves around the body.
It builds three-dimensional understanding
Students learn to view the body from the front, side and back. They begin noticing how a change made at one point can affect another part of the garment.
For example, pulling fabric tightly at the waist may change the direction of a fold near the bust. Adding volume at the hip may affect the balance of a skirt. Draping makes these relationships visible.
It develops fabric knowledge
Different textiles respond differently to gravity, folds, stretching and shaping. Students discover that a design cannot be separated from its material.
A soft fabric may fall into gentle folds, while a firmer fabric may hold a structured shape. Two textiles cut to the same dimensions can create completely different silhouettes.
It improves fitting awareness
Draping helps students recognise excess fabric, pulling, twisting and uneven balance. They can observe where the fabric needs shaping and how darts or seams may control volume.
It supports creative exploration
Some ideas emerge only when the designer begins working with fabric. A fold may suggest a neckline. Extra volume may become a sleeve feature. A mistake may even create a more interesting direction—although this should not become an excuse for avoiding measurements.
It connects design with construction
The final drape must eventually become a garment. Students learn that an attractive surface arrangement also needs sensible seams, openings, balance and construction planning.
Tools Used for Fashion Draping on Dress Form
Students do not need a room full of complicated equipment to begin. They need appropriate tools and a clear working method.
Dress form
The dress form provides the base for shaping and evaluating the garment. It should be stable, correctly positioned and suitable for pinning.
Practice fabric
Students often begin with an affordable fabric suitable for experimenting and marking. The chosen practice material should behave reasonably close to the intended design fabric when possible.
A very stiff practice material may not accurately represent a fluid final fabric. Likewise, a soft material may not help when the intended garment requires structure.
Draping pins
Pins hold the fabric in position while the shape is developed. They should be inserted carefully so the fabric remains secure without unnecessary distortion.
Measuring tape and ruler
These help students confirm lengths, widths, balance and reference points. Draping is creative, but measurements prevent creativity from quietly becoming a crooked hem.
Fabric scissors
Sharp fabric scissors allow clean cutting during the draping process. Students should avoid removing too much material too early because fabric is easy to cut and surprisingly difficult to put back.
Marking tools
Chalk, pencils or other suitable fabric-marking tools may be used to record seam lines, darts, balance points and reference positions.
Style tape
Narrow tape can be placed on the dress form to establish necklines, princess lines, waistlines or design seams. It gives students a clear boundary to follow during draping.
Pins, weights and working table
A clean table supports accurate preparation before the fabric reaches the form. Small weights may help hold fabric while marking or checking grain direction.
Understanding Fabric Behaviour Before Draping
Good draping begins before the first pin enters the fabric. Students need to observe how the textile moves, falls and responds to handling.
How Fabric Behaviour Affects Fashion Draping on Dress Form
Fabric behaviour determines whether a design looks soft, fitted, structured, voluminous or flat. The same draping method can produce different results when the textile changes.
Fabric weight
Lightweight fabric may create soft movement and smaller folds. Heavier material may fall with more visual weight and may require stronger structural support.
Weight does not automatically indicate quality or suitability. It simply affects how the fabric responds to gravity and shaping.
Drape
Drape refers to how fabric hangs and forms folds. A fluid textile may follow the body closely, while a crisp textile may stand away and create defined volume.
Students should handle the fabric, hang it and observe its folds before choosing a silhouette.
Stiffness
A stiffer fabric can support architectural forms, sharp pleats and structured shapes. A softer fabric may collapse when used for the same idea.
Stretch
Stretch affects fitting, tension and stability. A fabric that stretches can change shape while being pinned, particularly if the student pulls it too tightly.
Students should understand whether the stretch runs in one direction, several directions or is very limited.
Surface texture
Rough, smooth, shiny, matte, thick or delicate surfaces respond differently during handling. Texture may also change how gathers, folds and seam lines appear.
Transparency
Sheer materials may require additional planning for layers, seams and internal construction. Marks and pins may also be more visible.
Fabric direction
Fabric can behave differently along its length, width and diagonal direction. This is why students learn grainlines before attempting complicated drapes.
Grainline, Cross Grain and Bias Explained
Understanding fabric direction is central to draping.
Lengthwise grain
The lengthwise grain runs parallel to the selvage. It is generally treated as an important stable direction when positioning fabric.
Cross grain
The cross grain runs across the fabric from one selvage to the other. Its behaviour may differ from the lengthwise direction.
Bias
The bias runs diagonally across the woven structure. Fabric placed on the bias can behave with greater flexibility and may fall closer to curved body areas.
Bias draping can create graceful results, but it also demands control. If the fabric is stretched unevenly, the garment may twist or lose balance.
Students should mark the grain before placing fabric on the form. Once folds and pins cover the surface, finding the original direction becomes much harder.
Basic Dress Form Draping Technique
A good dress form draping technique follows an organised sequence. Students may adapt the process according to the design, but the basic principles remain similar.
Step 1: Study the design
Begin by understanding the garment rather than immediately pinning fabric.
Identify:
- The silhouette
- Main seam lines
- Neckline and armhole shape
- Areas of fit
- Areas of volume
- Gathers, pleats or folds
- Garment opening
- Symmetrical or asymmetrical features
If the design is based on a sketch, check whether the front, side and back have been considered. A sketch showing only the front may hide several construction questions.
Step 2: Prepare the dress form
Confirm that the form is upright and stable. Mark or check essential guide lines such as the centre front, centre back, waist, bust, hip and side seams.
If the design includes special seam lines, place style tape on the form before draping.
Step 3: Prepare the fabric
Estimate how much material is needed for the section being developed. Cut a manageable piece with enough allowance for pinning, shaping and marking.
Mark the grainline and other useful reference lines. Press the material if wrinkles could interfere with accuracy.
Step 4: Position the fabric
Place the fabric on the dress form according to the marked grainline. Anchor it at an important starting point, such as the centre front or waist, depending on the garment section.
Do not cover the entire form with pins immediately. Secure key points first so the material can still move while the shape is adjusted.
Step 5: Smooth without overstretching
Guide the fabric across the form using the hands. It should sit smoothly in fitted areas without being pulled so tightly that the grain becomes distorted.
Students should repeatedly check the marked grainline. If it begins curving unexpectedly, the fabric may have shifted or been stretched.
Step 6: Control excess fabric
The human body contains curves, while fabric begins as a flat surface. Excess material must therefore be controlled through features such as:
- Darts
- Seams
- Gathers
- Pleats
- Tucks
- Folds
- Ease
The chosen method should support both the design and garment construction.
Step 7: Check the silhouette from every angle
Stand back and examine the front, side and back. Check whether the garment appears balanced around the dress form.
A design may look perfect from the front while forming an unwanted bulge at the side. Draping requires movement around the form, not loyalty to one viewing angle.
Step 8: Mark important lines
Once satisfied, mark:
- Seam lines
- Dart positions
- Neckline
- Armhole
- Waistline
- Centre lines
- Balance points
- Notches or joining references
Marks should be clear enough to understand when the fabric is removed.
Step 9: Add seam allowance
The draped line represents the intended seam or edge. Seam allowance should be added according to the construction plan before the pattern or final fabric is cut.
Step 10: Remove and true the drape
Carefully remove the fabric from the form and place it flat. Straighten and correct lines while maintaining the shape developed during draping.
This process is called truing. It ensures seams that join together have suitable lengths and smooth connections.
Step 11: Create and test the pattern
The corrected drape can be transferred into a pattern. A sample garment may then be constructed and fitted to evaluate movement, comfort, proportion and finishing.
Fabric Draping for Beginners
Fabric draping for beginners should start with basic shapes rather than highly complicated gowns or sculptural garments.
Useful beginner exercises include:
- Basic front bodice
- Basic back bodice
- Straight skirt
- Simple gathered skirt
- Basic cowl neckline
- Controlled pleats
- Princess-line shaping
- Simple asymmetrical neckline
These exercises introduce grain control, pinning, fitting and marking without too many design elements competing for attention.
Beginners should work slowly. A faster drape is not automatically a better one. Accuracy comes from observing what the fabric is doing instead of forcing it to match the sketch immediately.
It also helps to photograph each stage. Progress images allow students to review where the grain shifted, when a fold became uneven or how a shape improved after correction.
Draping a Basic Bodice
A basic bodice is one of the most useful starting exercises because it introduces body shaping.
The student prepares a fabric piece, marks the grain and places it along the centre front. The fabric is then smoothed across the bust towards the side seam.
Since a flat textile cannot naturally follow every body curve, excess fabric appears. This excess may be shaped into waist or bust darts, depending on the exercise.
Important checks include:
- Centre-front grain remains straight.
- The fabric sits smoothly without excessive tension.
- Bust shaping points towards the correct area.
- Waistline remains level.
- Side seam follows the intended position.
- Neckline and armhole are marked without removing too much fabric.
The back bodice follows similar principles but introduces different curves and fitting requirements.
Draping Gathers, Pleats and Cowls
Once students understand basic fit, they can explore controlled volume.
Gathers
Gathers distribute fullness across a selected area. Students must decide where the volume begins, where it ends and how evenly it should be arranged.
Pleats
Pleats organise fullness into defined folds. Their depth, direction and spacing change the appearance and movement of the garment.
Cowls
Cowls use fabric direction and controlled looseness to create soft folds, often near a neckline or other design area. The fabric should fall naturally rather than looking forced.
Each method gives volume a different personality. Gathers feel soft, pleats look organised, and cowls behave as if the fabric has casually arranged itself—after the designer has spent considerable time arranging it.
Draping Versus Flat Pattern Making
Draping and flat pattern making are both useful garment-development methods. They are not rivals; many designers use them together.
Point of comparison | Draping | Flat pattern making |
Starting point | Fabric on a dress form | Measurements or blocks on paper |
View | Three-dimensional | Two-dimensional |
Main strength | Immediate visual development | Measured pattern control |
Useful for | Fluid, asymmetrical or experimental shapes | Structured and repeatable pattern development |
Fabric behaviour | Observed directly | Considered during pattern development and sampling |
Correction | Made on the form and after removal | Made on paper and during fitting |
Final requirement | Must be converted into a usable pattern | Already begins as a pattern |
A designer may drape an unusual bodice, transfer it to paper and then use flat-pattern principles to refine the construction. Learning both methods provides greater control over creative ideas.
Common Draping Problems and Their Solutions
The grainline becomes curved
This usually indicates that the fabric has shifted, stretched or been pulled around a body curve.
Return to the last secure point, release some pins and reposition the fabric. Do not try to hide the problem inside a dart without checking its cause.
The fabric forms diagonal wrinkles
Diagonal tension lines may indicate pulling, imbalance or insufficient room over a curved area.
Observe where the wrinkle begins and ends. Release tension gradually and check whether shaping is needed elsewhere.
One side looks different from the other
For a symmetrical design, differences may come from inaccurate guide lines, fabric movement or uneven pinning.
Complete one side carefully, mark it and use the resulting pattern to create symmetry rather than attempting to make both sides identical by eye.
The drape looks bulky
Too much fabric may be concentrated in one area, or the material may not suit the desired silhouette.
Review the design, fabric behaviour and method used to control fullness. More pins are not always the answer. Sometimes they simply make the bulk more securely attached.
The fabric keeps slipping
The material may be difficult to control, or the anchoring points may be insufficient.
Begin with a manageable section, establish the grain and secure key positions before developing the details.
The drape looks good but cannot be constructed
A visually attractive arrangement still needs seams, openings, support and finishing. Students should consider how the wearer will enter the garment and how every section will be sewn.
Designing a dress with no possible opening is creative until somebody has to wear it.
Mistakes Fashion Students Should Avoid
Cutting away excess fabric too early
Leave enough material for correction and seam allowance. Once fabric has been cut away, design options become limited.
Using too many pins
Pins should secure important points rather than replace proper shaping. Too many pins can hide wrinkles and make corrections difficult.
Ignoring the back and side view
A garment is three-dimensional. Walk around the form regularly and inspect the complete silhouette.
Pulling fabric too tightly
Excessive tension distorts the grain and may produce a misleading fit. Smooth the fabric while allowing it to follow the body naturally.
Forgetting to label markings
Unclear darts, seam lines and balance points become confusing after the drape is removed. Mark and label each part properly.
Starting with unsuitable fabric
The practice fabric should support the purpose of the exercise. Material that behaves very differently from the planned final fabric may create an inaccurate impression.
Skipping the sample garment
A successful drape is not the end of development. Constructing and fitting a sample helps identify construction, comfort and proportion issues.
How Regular Garment Draping Practice Builds Skill
Garment draping practice trains the eye and hand together. Students gradually learn how much fabric to prepare, where to anchor it and when to stop adjusting.
A useful practice routine can include:
- Draping one basic shape
- Photographing the front, side and back
- Marking and removing the drape
- Truing the pattern
- Constructing a sample
- Recording errors and corrections
- Repeating the exercise with another fabric
Students can also drape the same design using materials with different weights or levels of stiffness. This reveals how strongly fabric selection affects the result.
Keeping a draping journal is useful. It may contain fabric samples, photographs, pattern notes, fitting observations and corrected versions. Over time, this record shows progress more honestly than keeping only the prettiest final photograph.
Watch Fashion Draping in Practice
Youtube Video : https://www.youtube.com/shorts/S9yI38exozQ
Reading about draping explains the method, but seeing fabric shaped directly on a form makes the process easier to understand.
Watch this short demonstration of fashion draping on a dress form to observe how flat fabric can be pinned, controlled and arranged into a three-dimensional garment shape.
While watching, notice how the fabric is handled rather than looking only at the final silhouette. Pay attention to the starting position, pin placement, fold direction and overall balance.
Learning Draping Through a Fashion Design Programme
Draping becomes more valuable when it is connected with textile knowledge, pattern making, garment construction, illustration and design development.
ISFT’s B.Sc. in Fashion Design & Technology includes Draping in Semester 4. The programme also covers areas such as Textile Science, Fabric Studies, Pattern Making, Garment Construction, Fashion Illustration, CAD, garment manufacturing, design collection and portfolio development.
This wider learning structure matters because draping does not stand alone. Students need to understand what a textile can do, how a shape becomes a pattern and how that pattern becomes a finished garment.
The programme is designed for students who have passed Standard XII in any discipline and has a duration of three years. Students considering fashion education can review the Fashion Design and Technology course curriculum to understand how creative, technical and practical subjects are arranged across the semesters.
Learning Draping Through a Fashion Design Programme
garment construction, illustration and design development.
ISFT’s B.Sc. in Fashion Design & Technology includes Draping in Semester 4. The programme also covers areas such as Textile Science, Fabric Studies, Pattern Making, Garment Construction, Fashion Illustration, CAD, garment manufacturing, design collection and portfolio development.
This wider learning structure matters because draping does not stand alone. Students need to understand what a textile can do, how a shape becomes a pattern and how that pattern becomes a finished garment.
The programme is designed for students who have passed Standard XII in any discipline and has a duration of three years. Students considering fashion education can review the Fashion Design and Technology course curriculum to understand how creative, technical and practical subjects are arranged across the semesters.
Career Skills Supported by Draping
Draping may support several areas of fashion work because it develops practical understanding of silhouette, fit and fabric.
These skills can be useful in roles connected with:
- Fashion design
- Garment development
- Pattern development
- Fashion styling
- Costume development
- Sample coordination
- Design collection development
- Fashion illustration
- Visual presentation
- Independent fashion work
The exact responsibilities vary by role and employer. Draping by itself does not guarantee a particular job, but it can become a useful part of a student’s technical and creative foundation.
Students can also include selected draping exercises in a portfolio. A strong presentation may show the original concept, development photographs, final drape, pattern and completed sample. This demonstrates the thinking behind the result instead of presenting only one polished image.
Conclusion
Fashion draping on dress form teaches students how fabric, body proportions and design ideas work together. It turns a flat textile into a visible silhouette while revealing issues related to grain, balance, fit, volume and construction.
Beginners should start with basic bodices, skirts and controlled folds before moving towards complicated shapes. Marking grainlines, checking every angle and converting the finished drape into an accurate pattern are just as important as the creative arrangement itself.
ISFT includes draping within its B.Sc. Fashion Design & Technology curriculum alongside fabric studies, pattern making and garment construction. Students interested in developing both creative and practical fashion skills can review the programme details and speak with the ISFT admissions team to understand the learning pathway.
FAQs
1. What is fashion draping on dress form?
Fashion draping on dress form is a garment-development process in which fabric is placed, pinned and shaped directly on a three-dimensional body form. The designer uses grainlines, body reference points and fabric behaviour to create the desired silhouette. Once the shape is finalised, seam lines, darts and balance points are marked so the drape can be converted into a flat pattern.
2. Is fashion draping suitable for beginners?
Yes. Beginners can start with basic bodices, straight skirts, simple gathers and uncomplicated necklines. These exercises teach grain control, fabric handling, pin placement and marking. Complicated asymmetrical or sculptural designs are easier after the basic principles are understood. Students should focus on accuracy and observation first, rather than trying to complete an elaborate gown during their first practice session.
3. What fabric should beginners use for draping practice?
The fabric should be easy to handle, mark and pin while behaving reasonably close to the intended design material. The best choice depends on whether the exercise involves a fitted, fluid or structured shape. Students should avoid assuming that one practice fabric suits every design. Comparing two different materials through the same exercise is also a useful way to understand fabric behaviour.
4. Is draping better than flat pattern making?
Neither method is universally better. Draping allows students to observe the design directly in three dimensions, making it useful for fluid, asymmetrical or experimental shapes. Flat pattern making provides measured control on paper and supports repeatable garment development. Fashion designers often combine both methods by draping a shape first and then refining the resulting pieces through flat-pattern techniques.
5. Why is grainline important in draping?
Grainline controls how fabric hangs, stretches and balances on the form. If it shifts or curves unintentionally, the garment may twist, pull or fall unevenly. Students mark the grain before placing fabric on the form and check it throughout the process. Intentional bias draping is different because the diagonal direction is selected deliberately to achieve a particular fall or fit.
6. Can a draped garment be stitched directly after removing it from the form?
The draped pieces usually need to be marked, removed, trued and converted into an accurate pattern first. Seam allowances, notches, matching seam lengths and construction details must also be reviewed. A sample garment should then be stitched and fitted. Skipping these stages may produce pieces that looked attractive on the form but do not join or fit correctly during construction.
7. How can students improve their garment draping practice?
Students can improve by repeating basic exercises, working with different fabrics and recording every stage. They should photograph the front, side and back, mark the grain clearly and note any fit or balance problems. Constructing a sample from the corrected drape provides further learning. Regular practice is more useful than attempting one complicated design and avoiding draping for the next six months.
8. Does ISFT’s B.Sc. Fashion Design & Technology programme include draping?
Yes. Draping appears in Semester 4 of ISFT’s three-year B.Sc. in Fashion Design & Technology curriculum. The programme also includes subjects connected with fabric, pattern making, garment construction, illustration, CAD, garment manufacturing, design collection and portfolio development. Students should review the current programme page and speak with the admissions team for complete course and admission information.
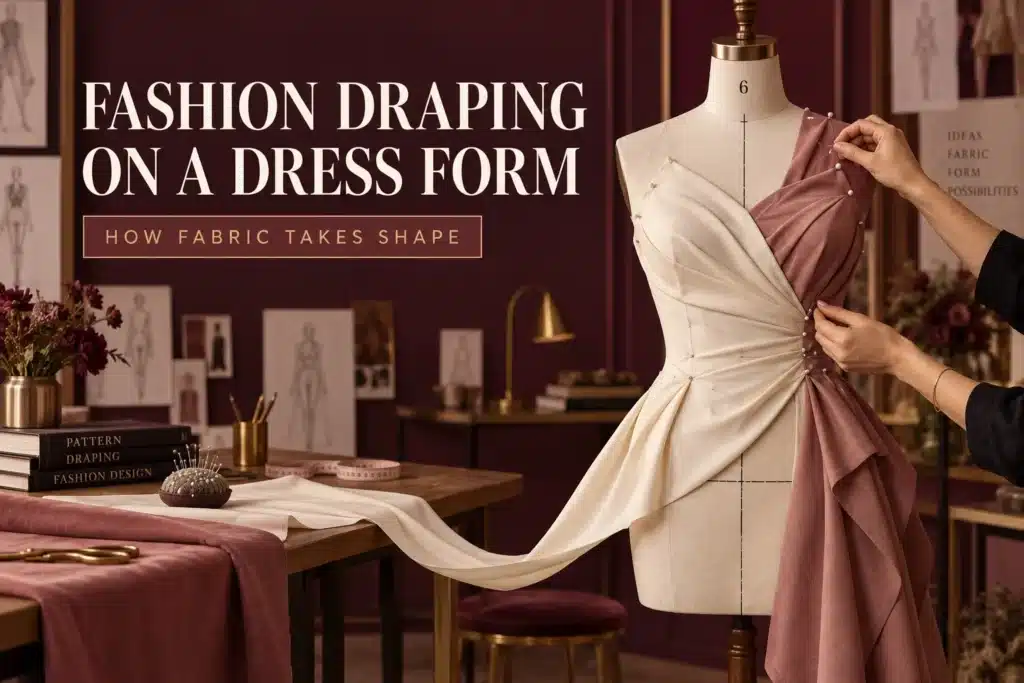
Table Of Content
- What Is Fashion Draping?
- What Is a Dress Form?
- Basic Dress Form Draping Technique
- Fabric Draping for Beginners
- Draping a Basic Bodice
- Draping Gathers, Pleats and Cowls
- Draping Versus Flat Pattern Making
- Common Draping Problems and Their Solutions
- Mistakes Fashion Students Should Avoid
- How Regular Garment Draping Practice Builds Skill
- Watch Fashion Draping in Practice
- Learning Draping Through a Fashion Design Programme
- Career Skills Supported by Draping
