

Punch needle embroidery in fashion gives students an interesting way to turn plain fabric into a textured surface. Using a punch needle, yarn or thread is pushed through fabric repeatedly to form loops and raised areas. What begins as a small practice swatch can later inspire a pocket detail, collar, panel, fashion accessory or decorative feature on a garment.
The technique may look simple when someone is working quickly, but good results depend on several decisions. Students need to select a suitable fabric, prepare the frame, understand the tool and control the direction, density and length of the loops.
A successful sample should not only look attractive. It must also be considered in relation to garment construction, placement, weight, comfort and care.
This is why punch needle workshops are useful for fashion students. They provide room to experiment while teaching an important design lesson: decoration works best when it supports the garment instead of competing with it.
What Is Punch Needle Embroidery?
Punch needle embroidery is a surface-decoration technique in which yarn or thread is pushed through a stretched fabric using a specialised hollow needle. Repeated punching creates loops on one side and flatter stitches on the other.
Depending on how the sample is designed, either side may be treated as the visible surface. The looped side provides a raised, textured appearance, while the reverse can create a flatter stitched effect.
The basic process involves:
- Preparing a design
- Selecting a foundation fabric
- Stretching the fabric tightly
- Threading the punch needle
- Pushing the tool through the fabric
- Repeating the movement to build shapes
- Finishing and securing the completed sample
- Considering how it could be used in a fashion product
Punch needle work can include solid areas, outlines, abstract marks, floral motifs, geometric patterns or experimental textures. The final effect depends on the materials, scale, stitch direction and loop density.
How Does a Punch Needle Work?
A punch needle has a hollow shaft through which the yarn or thread passes. As the needle enters and leaves the stretched fabric, it forms loops on the opposite side.
The tool is not used exactly like a regular sewing needle. Instead of pulling the entire length of thread through the fabric after each stitch, the student makes a repeated punching movement while guiding the needle across the surface.
The fabric must remain under suitable tension. If it becomes loose, the loops may not hold properly or may appear uneven.
The working method generally requires students to:
- Keep the tool correctly threaded
- Insert the needle fully and consistently
- Lift it only slightly while moving to the next point
- Keep the yarn supply loose and unobstructed
- Maintain a controlled direction
- Avoid pulling finished loops accidentally
A punch needle is not difficult to understand, but controlling it neatly takes practice. The first row often teaches more humility than embroidery.
How Is Punch Needle Embroidery in Fashion Used?
Punch needle embroidery in fashion can be used to create decorative surfaces, focal points and tactile details. However, the technique should be adapted thoughtfully because a textile sample and a wearable garment have different requirements.
Possible applications include:
- Jacket or shirt pockets
- Yokes
- Collars
- Cuffs
- Shoulder panels
- Decorative patches
- Bag panels
- Belts
- Statement accessories
- Selected sections of skirts or tops
- Textile jewellery
- Display or conceptual garments
The technique may be used across a complete panel or restricted to a small placement motif. A dense design can create a strong visual statement, while a lighter arrangement may add subtle surface interest.
Students should also consider the garment’s purpose. A decorative panel for a fashion presentation may allow more volume than an area placed where the body bends or frequently touches another surface.
Good fashion design is not simply about asking, “Can I add embroidery here?” It also asks, “Will the garment still work after I add it?”
Why Punch Needle Work Begins with a Textile Sample
A textile sample, also called a swatch, allows students to test an idea before applying it to a complete garment. It is a small-scale experiment in colour, texture, material and technique.
Beginning with a sample helps students understand:
- Whether the base fabric holds the loops
- How the yarn behaves
- How much texture is created
- Whether the colours work together
- How dense the design should be
- Whether the fabric becomes stiff or heavy
- Which side of the work looks more suitable
- How the edges can be finished
- Whether the idea can be repeated consistently
Testing is especially important when the student has never used a particular combination of fabric, yarn and needle.
A beautiful design on paper may become too bulky when stitched densely. A soft colour palette may look flat when translated into thick yarn. A delicate fabric may not support the intended surface.
The practice swatch reveals these problems before the student spends hours decorating a finished garment section.
Understanding Punch Needle Textile Design
Punch needle textile design combines technique with visual planning. Students need to decide what the surface should communicate and how the design will interact with the fabric beneath it.
Motif
A motif is the main shape or repeated element in the design. It may be floral, geometric, abstract, symbolic or inspired by nature and everyday objects.
The motif should suit the scale of the final product. A design that looks clear on a large wall textile may become unreadable on a narrow cuff.
Scale
Scale refers to the size of the motif, yarn and loops in relation to the textile surface.
Large loops and thick yarn can create a bold appearance. Finer materials can support smaller details, depending on the tool and foundation fabric.
Colour
Colour can be planned through contrast, harmony or gradual changes. Students should test the actual yarn against the garment fabric rather than relying only on digital references.
Lighting, texture and loop direction can change how a colour appears.
Rhythm
Repeated shapes, lines or colour changes create rhythm across the textile. Rhythm guides the viewer’s eye and helps separate an intentional composition from a collection of random stitches.
Texture
Texture is one of the main strengths of punch needle work. Students can vary visual and physical texture through yarn choice, loop height, spacing, colour and stitch direction.
Negative space
Not every area needs to be filled. Leaving sections of the base fabric visible can improve contrast and reduce unnecessary weight.
Empty space is still part of the design. It is not simply the area where the student became tired.
Materials and Tools Used in a Punch Needle Workshop
The exact materials depend on the project, but a basic workshop may involve the following items.
Punch needle
Punch needles are available in different forms and sizes. The needle should suit the yarn and the foundation fabric selected for the exercise.
Foundation fabric
The foundation fabric holds the loops. Its weave and stability affect how easily the tool passes through and how securely the loops remain in position.
A fabric selected only because it looks attractive may not work properly with the tool. Sampling should come first.
Yarn or thread
The thickness, texture, twist and colour of the yarn influence the final result. Students should check that the material moves freely through the needle.
Frame or hoop
The fabric is stretched across a frame or hoop to provide a firm working surface. Good tension helps the needle form consistent loops.
Design template
The motif may be drawn or transferred onto the foundation fabric. Students should remember that the visible design can appear reversed, depending on which side is selected as the final surface.
Fabric marker
A suitable marking tool helps transfer outlines and reference points. Marks should be tested on a scrap before being used on the final material.
Scissors and finishing materials
Scissors help trim yarn ends and refine the surface. Additional finishing materials may be used depending on how the textile sample will be handled or attached.
Step-by-Step Surface Ornamentation Exercise
A surface ornamentation exercise should help students understand both the technique and its possible use in fashion. The following process provides a clear starting point.
Step 1: Select a simple motif
Beginners should begin with a design containing clear shapes and manageable curves. A highly detailed illustration may be difficult to reproduce during the first attempt.
Suitable starting ideas include:
- A leaf
- A flower
- A curved line
- A geometric block
- A simple initial
- An abstract colour composition
Step 2: Decide the intended fashion use
Before beginning, imagine where the sample might be applied. Is it intended for a pocket, bag, collar or decorative patch?
This decision influences the size, shape, colour and density of the sample.
Step 3: Select compatible materials
Test whether the yarn passes through the needle smoothly and whether the foundation fabric can support the loops.
Do not wait until the motif is half complete to discover that the yarn has been fighting the needle since the first stitch.
Step 4: Transfer the design
Place the motif on the foundation fabric using a suitable transfer or marking method. Keep the outline clear but not overly complicated.
Consider whether the image must be reversed for the chosen working side.
Step 5: Stretch the fabric
Secure the foundation fabric tightly in the frame or hoop. The surface should remain even without visible sagging.
Check the tension again during the exercise because repeated punching may gradually loosen the fabric.
Step 6: Thread the punch needle
Follow the correct path through the tool so the yarn can move freely. Keep enough yarn available behind the hand and remove knots or tangles.
Restricted yarn may pull loops out of the fabric.
Step 7: Begin with the outline
Starting with the outline can help define the shape before larger areas are filled. Students should use controlled movements and maintain a consistent direction.
Step 8: Fill the main areas
Work gradually across the design. Observe the density instead of punching repeatedly without looking at the visible side.
Turn the frame when necessary so the tool remains comfortable to control.
Step 9: Inspect both surfaces
Check the looped and flatter sides. Look for:
- Uneven loops
- Empty spaces
- Overcrowded sections
- Loose yarn
- Distorted outlines
- Changes in fabric tension
Some irregularity may be part of a handmade surface, but accidental gaps and loose areas should be corrected.
Step 10: Finish the sample
Complete the edges and yarn ends according to the planned use. Avoid pulling or cutting loops carelessly.
Step 11: Label the swatch
Record useful information such as:
- Material used
- Needle size or type
- Base fabric
- Colour combination
- Stitch direction
- Intended application
- Problems noticed
- Changes for the next sample
A well-labelled swatch becomes a learning resource instead of a mysterious piece of fabric found in a drawer three months later.
From Practice Swatch to Embroidered Garment Detailing
Moving from a sample to embroidered garment detailing requires more planning than simply stitching the motif onto a larger piece of fabric.
Choose the placement
The detail should support the garment’s shape and visual balance. A motif near the shoulder creates a different effect from the same motif at the hem.
Students can place a paper version of the design on a garment or dress form before committing to embroidery.
Check scale against the body
A motif may look large on a table but appear small once placed on a garment. Evaluate it from a normal viewing distance.
Consider movement
Areas around elbows, underarms, waistbands and other movement points may face bending or friction. The technique and placement should account for how the garment will be worn.
Review weight
Dense yarn work can add weight and stiffness. The base fabric must be able to support the decoration without sagging or becoming distorted.
Plan construction order
Students need to decide whether the embroidery should be completed before or after the garment section is assembled.
Working on a flat panel may be easier, but seam lines and allowances must remain clear. Embroidering after construction may make certain areas difficult to reach.
Keep seam allowances free
Decorative work placed directly into a seam may create unnecessary bulk or become damaged during stitching and finishing.
Test care and handling
The finished detail should be evaluated according to the intended garment use. Materials and finishing methods may respond differently to washing, pressing, folding or repeated wear.
No universal care method suits every combination. Students should test the actual sample and plan suitable care instructions.
Flat Embroidery and Punch Needle Compared
Point | Punch needle embroidery | Traditional hand embroidery |
Main action | Yarn is repeatedly punched through stretched fabric | Thread is passed through fabric using a needle |
Surface effect | Often looped, raised and textured | Can range from flat to raised |
Working tool | Hollow punch needle | Regular embroidery needle |
Thread handling | Yarn feeds continuously through the tool | Thread is pulled through with each stitch |
Fabric preparation | Firm frame tension is important | A hoop or frame may be used depending on the technique |
Fashion use | Textured patches, panels and statement areas | Motifs, borders, fine details and varied surface work |
Beginner challenge | Maintaining loops and fabric tension | Learning stitch types and controlling thread tension |
Both methods support surface design, but their appearance and working process are different. Students may combine them when the design and material allow.
Common Problems in Punch Needle Embroidery
Loops keep pulling out
This may happen when the yarn supply is restricted, the needle is lifted too far between punches or the fabric does not hold the loops effectively.
Check the threading, remove tangles and keep the working movement close to the surface.
The fabric becomes loose
Repeated punching can reduce frame tension. Pause and tighten the fabric before continuing.
Working on a loose surface can make the loop height and spacing inconsistent.
The needle does not move smoothly
The yarn may be too thick for the tool, or the combination of tool and foundation fabric may be unsuitable.
Test the materials on a scrap rather than forcing the needle. A creative workshop should develop textile skills, not an arm workout.
Gaps appear between filled areas
The punches may be spaced too widely or arranged without a clear direction. Observe the looped side regularly and adjust the spacing.
The design looks untidy
Untidy results can come from inconsistent movement, changing stitch direction without a plan or using too many colours and textures in a small area.
Simplify the design and focus on control.
The base fabric puckers
The fabric may have lost tension, or the completed embroidery may be too dense for the foundation. Review the material combination and sample density.
The outline appears reversed
The design may have been drawn without considering which side would become visible. Decide the display side before transferring text, initials or directional motifs.
What Students Learn During a Punch Needle Workshop
A workshop teaches more than how to operate a tool. It helps students connect surface design with garment planning.
Material compatibility
Students see that yarn, fabric and tool selection must work together. Attractive materials are not automatically compatible materials.
Tension control
They learn how frame tension and yarn movement affect loop formation.
Colour planning
The exercise allows students to test combinations at a small scale before developing a larger fashion surface.
Patience and consistency
Punch needle embroidery contains repeated movements. Consistency improves as students develop hand control and learn to maintain a working rhythm.
Problem-solving
When loops pull out or fabric loosens, students must identify the reason and correct the process.
Design editing
Students learn when to add texture and when to stop. Filling every available centimetre is an option, but it is not always a design decision.
Application thinking
The most important stage is asking how the sample could become part of a garment or accessory. This connects workshop learning with fashion development.
Creating a Strong Textile Sample Sheet
Students can present completed swatches as part of a textile file or portfolio. A clear sample sheet should explain both the visual idea and the technical learning.
It may include:
- Name of the technique
- Design inspiration
- Colour palette
- Original motif
- Foundation fabric
- Yarn or thread details
- Development photographs
- Final textile swatch
- Intended garment application
- Reflection on problems and corrections
The presentation should not hide mistakes without explanation. Showing how a problem was corrected can demonstrate observation and development.
Students can also photograph the sample against a garment sketch or place it digitally within an illustration. This helps viewers understand how the textile might appear when scaled and positioned on clothing.
Designing a Statement Detail Without Overloading the Garment
A statement detail should attract attention while still belonging to the complete garment.
Students should ask:
- Where should the viewer look first?
- Does the embroidery support the silhouette?
- Is the colour connected with the rest of the outfit?
- Is the scale suitable for the garment?
- Does the placement allow comfortable movement?
- Is the decoration too heavy for the base fabric?
- Can the garment be constructed and finished neatly?
One embroidered panel may communicate the idea more clearly than several unrelated placements. Restraint is not a lack of creativity. Sometimes it is the part of creativity that remembers somebody will eventually wear the garment.
Sustainable Thinking in Textile Sampling
Sampling can help students make more considered material decisions. Small swatches allow them to test a technique before using larger quantities of fabric or yarn.
Students can organise leftover yarn by colour and thickness for future exercises. Practice work may also be planned around smaller remnants where suitable.
However, using leftover materials does not automatically make a project sustainable. Designers should still consider durability, construction, care, repair and whether the decoration supports the intended life of the garment.
The useful lesson is to experiment with purpose. A sample should answer a question, such as:
- Will this fabric hold the loops?
- Is the design too dense?
- Does the colour combination work?
- Can this texture sit on a collar?
- How will the embroidery affect the fabric?
When each swatch has a purpose, even an unsuccessful sample provides useful information.
Watch Punch Needle Embroidery in Practice
Youtube Video : https://www.youtube.com/shorts/gnf-w70Dw34
A practical demonstration can make the rhythm of the technique easier to understand. Watch this short punch needle embroidery workshop video to see how students work with fabric, yarn and the punch needle to create a textured surface.
While watching, observe how the material is held, how closely the punches are placed and how the design develops section by section.
The final appearance is useful, but the working process is equally important. Students can learn a great deal by noticing hand position, frame tension, colour placement and how the surface changes as more loops are added.
Learning Surface Ornamentation at ISFT
ISFT’s Certificate Course in Fashion Design & Technology includes Surface Ornamentation as part of its curriculum. The programme also introduces learners to Elements and Principles of Design, Textile Science, Fashion Illustration, Garment Construction, Draping, Fashion Accessories, and Communication and Personality Development.
The six-month intensive programme is offered online and is open to learners across age groups. According to the course structure, students learn through live online classes, recorded sessions, creative assignments, workshops, hands-on projects, mentor guidance and portfolio development.
This broader approach is useful because surface ornamentation does not exist separately from fashion design. Students need to understand colour, textiles, construction, silhouette and presentation to turn a decorative sample into a thoughtful garment detail.
Learners interested in developing these connected skills can explore the online Certificate Course in Fashion Design & Technology and speak with the ISFT admissions team for current programme information.
Conclusion
Punch needle embroidery in fashion teaches students how a basic textile exercise can develop into a considered garment detail. The process builds understanding of fabric tension, yarn behaviour, colour, texture, placement and construction.
A strong result begins with a small swatch. Students should test the tool and material combination, control the loops, record what they learn and evaluate how the finished texture may behave on clothing. The most attractive sample is not always the most wearable one, so scale, weight and movement must be considered before final application.
ISFT includes Surface Ornamentation within its Certificate Course in Fashion Design & Technology, connecting decorative techniques with textile science, illustration, draping and garment construction. Learners who want to explore practical fashion skills can review the course and discuss the programme with the ISFT admissions team.
FAQs
1. What is punch needle embroidery in fashion?
Punch needle embroidery in fashion is a surface-decoration technique used to create looped or textured areas on fabric. A specialised hollow needle pushes yarn through a stretched foundation material. Fashion students can use the resulting surface as inspiration for patches, collars, pockets, panels or accessories. The technique must be planned around garment weight, movement, construction and intended use.
2. Is punch needle embroidery suitable for beginners?
Yes. Beginners can start with a small frame, a simple motif and a limited colour palette. The first exercise should focus on threading the tool, maintaining fabric tension and forming consistent loops. Large or highly detailed designs can be attempted later. Preparing more than one practice swatch helps students understand how different fabrics, yarns and stitch spacing affect the result.
3. Why does punch needle embroidery come out of the fabric?
Loops may pull out when the yarn cannot move freely, the needle is lifted too far between punches or the foundation fabric does not hold the loops properly. Loose frame tension can also create inconsistent work. Check the tool threading, remove knots and avoid pulling the working yarn. Always test the selected needle, yarn and fabric together before beginning a full design.
4. Can punch needle embroidery be used directly on clothing?
It may be used as embroidered garment detailing, but the fabric and placement should be tested first. Dense embroidery can add weight, stiffness and thickness. Areas that bend or experience friction may behave differently from decorative panels. Students should prepare a swatch, assess the base fabric and plan whether the embroidery will be completed before or after garment construction.
5. What can students make with punch needle textile design?
Students can develop samples for pockets, collars, cuffs, yokes, bag panels, patches, belts and statement accessories. They may also create experimental fashion surfaces or combine punch needle work with other ornamentation methods. The most suitable application depends on the design scale, yarn, base fabric, construction and intended use. A sample should always be evaluated on or near the planned garment area.
6. Which side of punch needle embroidery should be displayed?
Either side may be used, depending on the intended appearance. One side generally shows raised loops, while the other has a flatter stitched surface. Students should decide the visible side before transferring directional motifs, letters or asymmetrical designs because the result may appear reversed. Both surfaces should be inspected during sampling to determine which one supports the design more effectively.
7. How can students present punch needle work in a fashion portfolio?
Students can present the original inspiration, motif development, colour palette, material choices, process photographs and finished sample. They should also show how the texture could be placed on a garment or accessory. A fashion illustration, digital mock-up or photographed placement can provide context. Including brief notes about problems and corrections demonstrates learning, not merely the ability to create a neat final swatch.
8. Does ISFT’s certificate fashion course include surface ornamentation?
Yes. Surface Ornamentation is included in ISFT’s Certificate Course in Fashion Design & Technology. The six-month intensive online programme also covers textile science, fashion illustration, garment construction, draping, fashion accessories and design principles. Learners can review the current curriculum, eligibility and study format on the official programme page and contact the admissions team for complete course details.
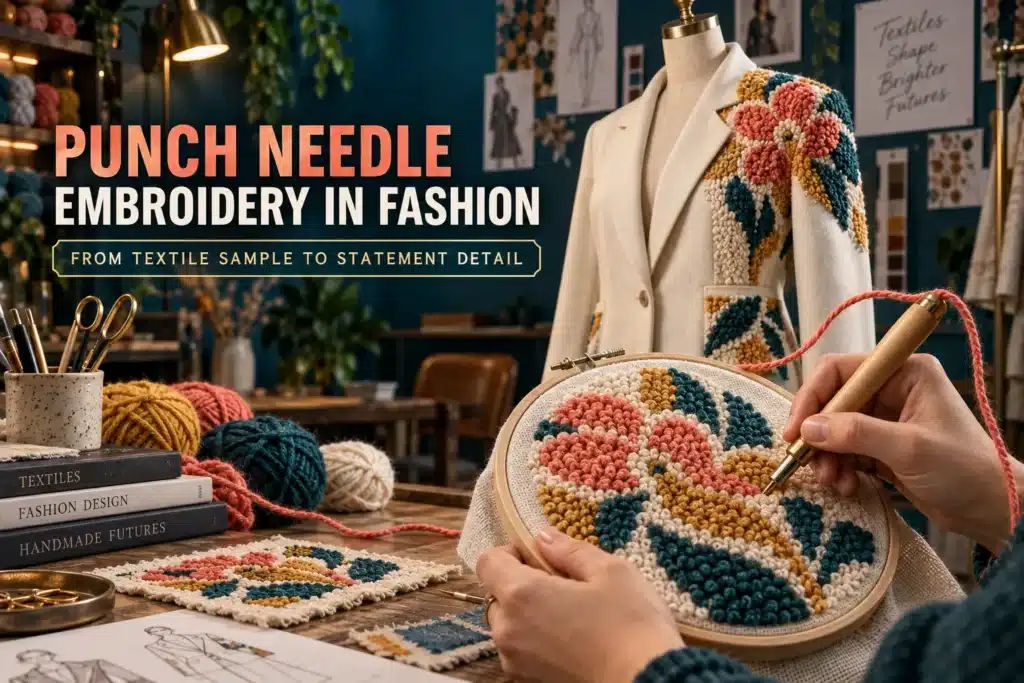
Table Of Content
- What Is Punch Needle Embroidery?
- How Does a Punch Needle Work?
- How Is Punch Needle Embroidery in Fashion Used?
- Why Punch Needle Work Begins with a Textile Sample
- Understanding Punch Needle Textile Design
- Materials and Tools Used in a Punch Needle Workshop
- Step-by-Step Surface Ornamentation Exercise
- From Practice Swatch to Embroidered Garment Detailing
- Flat Embroidery and Punch Needle Compared
- Common Problems in Punch Needle Embroidery
- What Students Learn During a Punch Needle Workshop
- Creating a Strong Textile Sample Sheet
- Designing a Statement Detail Without Overloading the Garment
- Why Students Mark Grainlines Before Draping
- Sustainable Thinking in Textile Sampling
- Watch Punch Needle Embroidery in Practice
