

Fashion photoshoot planning begins with the garment collection, not the camera. Before selecting a location or asking a model to pose, students need to understand what the clothes are trying to communicate. The colours, fabrics, silhouettes, details and design inspiration should guide every visual decision.
A strong fashion image does more than make a garment look attractive. It helps viewers understand its shape, mood, texture and intended wearer. The location, styling, lighting and pose should support these qualities rather than pulling attention away from them.
This is why a photoshoot requires planning. Without a clear direction, students may collect beautiful references, dramatic accessories and interesting poses that have little connection with the actual garments.
A detailed plan also helps the photographer, model, stylist, hair and makeup team work towards the same result. Otherwise, one person may be creating a soft romantic story while another arrives prepared for a dark editorial—and the garment quietly wonders which photoshoot it has entered.
What Is Fashion Photoshoot Planning?
Fashion photoshoot planning is the process of organising the creative and practical decisions required to photograph garments or a collection.
It commonly includes:
- Understanding the collection
- Defining the purpose of the images
- Developing a shoot concept
- Creating a mood board
- Selecting models
- Planning styling
- Choosing a location or studio
- Deciding the lighting direction
- Preparing poses
- Making a shot list
- Creating a schedule
- Checking garments
- Coordinating the team
- Reviewing and selecting the final images
These steps are connected. A change in one area may affect several others.
For example, selecting an outdoor location influences footwear, garment handling, makeup, lighting and the shoot schedule. Choosing a movement-based pose affects garment preparation and camera settings. Adding a large accessory may hide the main surface detail.
Good planning helps the team identify these relationships before the shoot begins.
Start by Understanding the Garment Collection
The collection should provide the foundation for the visual concept.
Students should review every look and identify the qualities that connect them. These may include:
- Design inspiration
- Colour palette
- Fabric type
- Silhouette
- Surface ornamentation
- Construction details
- Cultural references
- Intended season
- Target wearer
- Mood
- Garment movement
- Styling direction
Find the collection story
A collection story explains the idea behind the garments. It does not need to be complicated, but it should provide a clear direction.
For example, a collection may explore:
- Urban structure
- Natural movement
- Traditional craft
- Minimal tailoring
- Youth culture
- Soft romantic forms
- Bold geometric shapes
- Recycled or repurposed inspiration
- Travel memories
- A historical period
The photoshoot should communicate this story visually. A collection inspired by clean architectural lines may need a different setting from one based on soft botanical forms.
Identify the strongest garment features
Students should list what the photographs need to show:
- Draped neckline
- Structured shoulder
- Embroidery
- Fabric transparency
- Layering
- Back detail
- Sleeve volume
- Hand finishing
- Garment movement
These features influence camera angles, poses and lighting.
Decide which look leads the collection
The hero look often receives the strongest visual treatment. It may represent the collection most clearly or contain its most important details.
However, every look still needs useful documentation. A shoot should not produce twenty excellent photographs of one outfit and two hurried images of everything else.
Define the Purpose of the Photoshoot
The same collection can be photographed in several ways depending on the intended use.
Possible purposes include:
- Student portfolio
- Collection documentation
- Editorial fashion story
- Lookbook
- Social media
- Exhibition presentation
- Website
- College project
- Designer profile
- Garment-detail record
A portfolio shoot may require clear full-length images and detail shots. A social-media shoot may use more vertical frames and movement. An editorial story may allow greater experimentation with angles, crops and setting.
Students should list all intended uses before the photographer plans the frames. This reduces the chance of finishing the shoot without the required image format.
Fashion Shoot Concept Planning
How Does Fashion Shoot Concept Planning Begin?
Fashion shoot concept planning begins by translating the garment collection into a clear visual idea. Students define the mood, setting, colour direction, model attitude, styling and type of photographs required.
A practical concept statement may answer four questions:
- What is the collection about?
- What should the images make viewers feel?
- Where does this visual story take place?
- How should the garments appear within that setting?
For example:
A clean, structured fashion story using strong shadows and architectural backgrounds to highlight sharp tailoring and geometric garment lines.
This statement provides more direction than simply writing “modern photoshoot.”
Keep the idea specific
Broad themes such as elegant, vintage, bold or aesthetic can mean different things to different people.
A useful concept defines:
- Period or influence
- Colour mood
- Light quality
- Background
- Model expression
- Movement
- Composition
- Editing direction
Check whether the concept suits every look
A concept that works for the hero garment may not support the full collection. Test the idea against different colours, silhouettes and fabric qualities.
Avoid copying a reference exactly
Reference images are useful for understanding mood, lighting or pose. The final concept should still come from the student’s collection.
If every idea has been borrowed separately, the mood board may look impressive while the final shoot feels like five unrelated magazines met by accident.
Creating a Useful Fashion Mood Board
A mood board brings the visual direction together so that the complete team can understand it quickly.
It may include:
- Collection photographs
- Colour palette
- Location references
- Lighting examples
- Model expressions
- Pose ideas
- Hair references
- Makeup direction
- Accessories
- Composition examples
- Texture
- Editing mood
Keep references connected
Every image should help explain the same concept. Remove references that are attractive but unrelated.
Label important points
Short notes can clarify whether an image is included for its lighting, pose, location or colour.
Include the garments
The mood board should not exist separately from the collection. Add garment sketches, fabric samples or fitting photographs.
Show what should be avoided
A small “avoid” section may help the team understand unsuitable poses, backgrounds or styling choices.
The mood board is a communication tool, not a competition to see who can fit the most photographs on one page.
Choosing Between a Studio and a Location
The setting affects the mood, lighting, logistics and cost of a photoshoot.
Studio photoshoot
A studio may provide greater control over background, lighting and interruptions. It can suit clean collection documentation, lookbooks and conceptual fashion images.
Points to consider include:
- Background colour
- Available space
- Lighting equipment
- Changing area
- Power supply
- Garment storage
- Team movement
- Props
Location photoshoot
A location can add architecture, nature, colour or cultural context. It may strengthen the collection story when selected carefully.
Points to consider include:
- Permission
- Access
- Weather
- Public movement
- Changing facilities
- Privacy
- Power
- Safety
- Travel
- Time restrictions
- Ground conditions
- Garment protection
Which option is better?
Neither is automatically better. The setting should serve the collection and the purpose of the images.
A dramatic location is not useful if the background overpowers delicate garments. A plain studio is not boring when the clothing itself contains enough visual interest.
Planning Garment Collection Photography
Garment collection photography should provide both creative images and clear records of the designs.
Students can divide the shot plan into categories.
Full-length photographs
These show the complete silhouette, proportion and styling.
Useful views may include:
- Front
- Side
- Back
- Three-quarter angle
- Walking or movement view
Mid-length photographs
These help show bodice construction, sleeves, layering and accessories.
Detail photographs
Close-ups may capture:
- Embroidery
- Fastenings
- Pleats
- Seams
- Surface techniques
- Fabric texture
- Handwork
- Accessories
Collection group photograph
A group image shows how the looks relate through colour, silhouette and styling.
Editorial photographs
These may use stronger poses, unusual crops or visual storytelling. They can add personality but should not replace clear garment images.
Process photographs
Behind-the-scenes images of fittings, styling, makeup and direction can support portfolio storytelling.
Matching Styling with the Collection
Styling includes everything worn or shown with the garments.
This may involve:
- Footwear
- Jewellery
- Bags
- Belts
- Headwear
- Gloves
- Hosiery
- Layering
- Hair
- Makeup
- Props
Begin with the garment
Ask what the garment already communicates. Accessories should complete or strengthen that message.
Control visual competition
If a garment contains detailed surface work, heavy jewellery may compete with it. A minimal outfit may support a stronger accessory.
Check proportion
Accessory size should relate to the garment and model. A small bag may create a delicate impression, while a large structured piece may change the visual balance.
Test everything together
Styling should be reviewed on the model before the shoot. Photograph the complete look from several angles.
Something that appears perfect on a styling table may sit awkwardly against the garment. Clothes, unlike mood boards, have to deal with gravity.
Selecting the Model
Model selection should consider how the individual can present the garments and support the intended visual direction.
Students may review:
- Garment measurements
- Model measurements
- Comfort
- Movement
- Expression
- Pose requirements
- Number of looks
- Styling suitability
- Shoot duration
A fitting should be completed before the shoot where practical. This provides time for corrections and helps the model understand the collection.
The student should explain the concept rather than telling the model only to “look fashionable.” Clear direction may include words such as calm, confident, distant, playful, controlled or energetic.
Hair and Makeup Planning
Hair and makeup influence how viewers understand the collection.
Hair direction
Hair may appear:
- Natural
- Structured
- Sleek
- Textured
- Soft
- Dramatic
- Period-inspired
- Experimental
The style should not hide important collars, shoulders, necklines or back details.
Makeup direction
Makeup may be understated or expressive depending on the collection. The plan should consider colour, lighting and camera distance.
Prepare visual references
Share a small set of clear references with the hair and makeup team. Explain what each reference contributes.
Test where necessary
A test may reveal how colours behave under the intended lighting or whether the hairstyle remains secure during movement.
Planning Poses Around the Garments
Poses should help viewers understand the clothing.
Structured garments
Clean, controlled poses may highlight tailoring, shoulders and geometric lines.
Flowing garments
Movement, turns and walking may show volume and fabric behaviour.
Surface detail
A pose may position the body so embroidery, print or construction remains visible.
Back detail
Include specific back-facing and turning poses when the garment contains important design work behind.
Layered looks
The model may need to separate or hold selected layers so their construction can be understood.
Accessories
Hands should be positioned naturally around bags, belts or jewellery.
Students can create a pose reference sheet, but the model and photographer should adapt it to the actual garment.
Forcing an exact pose from a reference may hide the collection’s strongest feature. The photograph should serve the outfit, not win a complicated-body-position contest.
Lighting for Fashion Photography
Lighting determines how colour, texture, shape and mood appear.
Soft lighting
Soft light creates gentle transitions between highlights and shadows. It may suit delicate, romantic or clean visual directions.
Hard lighting
Hard light produces stronger shadows and contrast. It can support structured or dramatic concepts.
Front lighting
Front light can show garment colour and details clearly, though it may reduce visible depth when used without variation.
Side lighting
Side light can reveal texture and form through shadow.
Backlighting
Backlight may highlight silhouettes, sheer fabric or edges. Important front details may require additional planning.
Natural light
Natural light can provide a pleasing result, but its direction and strength change with time and weather.
Test the garment colours
Fabric can appear different under different lighting. Shiny, sheer, dark and light materials also reflect or absorb light differently.
The team should test representative garments before finalising the setup.
Creating a Shot List
A shot list records every required photograph. It keeps the shoot organised and protects important images from being forgotten.
A useful shot list may contain:
Look | Required frame | Key detail | Pose or movement | Image use |
Look 1 | Full-length front | Overall silhouette | Standing | Portfolio |
Look 1 | Three-quarter | Sleeve shape | Arm slightly raised | Editorial |
Look 1 | Close-up | Embroidery | Still detail | Portfolio |
Look 2 | Full-length side | Layering | Walking | Social media |
Look 2 | Back view | Back construction | Turning | Documentation |
Full collection | Group frame | Colour relationship | Planned arrangement | Collection opener |
Students should mark completed shots during the shoot. Memory becomes less dependable once the location is busy, the light is changing and one earring has disappeared.
Building the Photoshoot Schedule
A schedule should allow time for preparation, shooting, changing and corrections.
Include:
- Team arrival
- Location or studio setup
- Lighting test
- Hair and makeup
- First-look fitting
- Individual look timings
- Garment changes
- Breaks
- Group photographs
- Detail photographs
- Backup time
- Pack-up
Shoot complex looks strategically
A garment that requires complicated styling or lengthy preparation may need a larger time block.
Consider natural light
For an outdoor shoot, plan important frames around the expected light conditions while allowing for change.
Avoid impossible changes
If one model is wearing several looks, organise them so hair, makeup and accessories can transition practically.
Add buffer time
Small delays are normal. A schedule with no buffer assumes that zips never stick, weather never changes and every team member can teleport.
Preparing Garments for the Shoot
Every outfit should be checked before leaving for the location or studio.
Garment checklist
- Correct look number
- All garment pieces
- Fastenings working
- Alterations complete
- Hem checked
- Loose threads removed
- Surface decoration secure
- Garment pressed
- Accessories packed
- Footwear confirmed
- Undergarment requirements noted
- Styling photograph attached
Pack an emergency kit
The kit may contain suitable items for minor corrections, such as:
- Needles and thread
- Safety pins
- Fashion tape
- Small scissors
- Clips
- Lint roller
- Stain-management supplies suited to the garments
- Spare fastenings
- Steaming or pressing tools where available and appropriate
Garments should be stored and transported according to their structure and material. Folding a heavily structured look into the smallest possible bag may save space while creating a fresh collection of creases.
Team Roles During a Student Designer Photoshoot
A student designer photoshoot can involve several people, even when the production is small.
Student designer
Explains the collection, checks garments and helps approve the final visual direction.
Photographer
Plans framing, camera position and image capture based on the brief.
Stylist
Coordinates garments, accessories and complete looks.
Model
Presents the clothing through posture, expression and movement.
Hair and makeup team
Develops the planned appearance while maintaining continuity between frames.
Shoot coordinator
Tracks the schedule, shot list and communication.
Garment assistant
Helps with changes, adjustments, steaming and maintaining the outfits.
Behind-the-scenes team
Captures process material without interrupting the main photographer.
When roles overlap, responsibilities should still be discussed before the shoot. “Everyone will handle everything” generally means everyone assumes somebody else handled the missing shoes.
Directing the Model During the Shoot
Model direction should be clear, respectful and connected with the garment.
Useful instructions include:
- Shift weight to one side.
- Turn the shoulder towards the light.
- Keep the sleeve visible.
- Walk slowly and allow the fabric to move.
- Hold the pose for the detail shot.
- Look past the camera.
- Relax the hands.
- Turn gradually to show the back.
Avoid giving five instructions at once. Build the pose through small changes.
Show the model selected frames during the shoot so they can understand what is working. The designer should also check whether garment details are folded, hidden or sitting incorrectly.
Maintaining Visual Consistency Across the Collection
A collection should look connected even when individual poses and frames vary.
Consistency may come from:
- Background
- Lighting
- Colour treatment
- Camera height
- Framing
- Hair and makeup
- Model attitude
- Editing
- Repeated visual elements
Consistency does not mean every photograph must look identical. Each look can have its own movement while belonging to the same visual story.
Students should compare images during the shoot. A later look may accidentally become much warmer, darker or more dramatic than earlier frames.
Common Fashion Photoshoot Planning Mistakes
Choosing the location before understanding the collection
A visually attractive location may not support the garments. Begin with the design story.
Using too many reference images
An overloaded mood board creates mixed instructions. Select references that explain one direction.
Forgetting clear garment photographs
Editorial images may look impressive but hide important details. Capture documentary frames as well.
Skipping fittings
Poor fit becomes more visible in photographs. Schedule corrections before the shoot.
Overstyling the look
Too many accessories can weaken the garment’s identity. Remove anything that does not contribute.
Ignoring the back of the garment
A collection may contain important back details that disappear from the shot list. Plan front, side and back views.
Depending on editing to fix everything
Post-production cannot fully correct poor fit, hidden details, missing shots or an unsuitable concept.
Failing to back up photographs
Image files should be copied and organised after the shoot. A complete production should not depend on one memory card behaving perfectly forever.
Reviewing and Selecting Final Images
After the shoot, students should review photographs according to their purpose.
Check:
- Garment visibility
- Fit
- Pose
- Expression
- Sharpness
- Lighting
- Colour
- Styling
- Background
- Collection consistency
- Important details
- Image orientation
Do not select several nearly identical photographs. Choose frames that perform different jobs.
A practical final set may include:
- Strong full-length image
- Three-quarter view
- Back or side view
- Movement image
- Detail photograph
- Editorial frame
- Collection group image
- Behind-the-scenes photograph
Image editing should create consistency without changing the actual garment design or material colour beyond recognition.
Using the Photoshoot in a Fashion Portfolio
The portfolio should explain both the collection and how it was presented.
A project section may contain:
- Design concept
- Inspiration
- Colour and fabric direction
- Garment sketches
- Development process
- Final collection
- Photoshoot concept
- Mood board
- Selected photographs
- Reflection
Students should explain why the location, styling, poses and lighting were selected. This demonstrates visual reasoning.
A short reflection can also mention what changed during the shoot and what would be planned differently next time. Honest evaluation shows growth.
Watch a Fashion Photoshoot Come Together
Youtube Video : https://www.youtube.com/shorts/aWxu-oCTKPM
View this short fashion collection photoshoot to observe how garments, styling, poses, setting and photography work together within one visual direction.
While watching, notice:
- How the location relates to the garments
- Which garment details remain visible
- How the model’s pose changes the silhouette
- How fabric moves
- How framing affects the collection
- How styling supports the mood
- Which moments would be useful in a portfolio
The final images may look effortless, but the result depends on many small decisions made before and during the shoot.
Learning Fashion Styling and Photography at ISFT
ISFT’s Post Graduate Diploma in Fashion Design & Technology includes Fashion Styling & Photography in Semester 2. The curriculum also covers design principles, textile science, sewing, illustration, surface ornamentation, pattern making, garment construction, draping, merchandising, accessories, CAD, portfolio development, craft study and internship.
These areas connect directly with photoshoot preparation. Garment construction supports fit and finish. Textile knowledge helps students understand fabric behaviour under light. Styling establishes the complete look, while portfolio development guides the final selection and presentation of images.
The programme is designed for graduates from recognised universities and has a duration of one or two years, depending on the specialisation.
Learners interested in developing advanced fashion skills can explore the Post Graduate Diploma in Fashion Design & Technology and contact the ISFT admissions team for current programme details.
Conclusion
Fashion photoshoot planning helps students turn a garment collection into a clear visual story. The concept, location, model, styling, poses, lighting and framing should all begin with the clothing and its purpose.
Start by writing a short concept statement and listing the garment details that every photograph must show. From there, prepare a focused mood board, fitting schedule, styling plan and shot list. This reduces confusion and helps the team produce both creative images and useful collection documentation.
ISFT’s Post Graduate Diploma in Fashion Design & Technology includes Fashion Styling & Photography alongside garment construction, textiles, draping, CAD and portfolio development. Graduates interested in connecting fashion creation with professional presentation can review the programme details and speak with the ISFT admissions team about the available study pathway.
FAQs
1. What is fashion photoshoot planning?
Fashion photoshoot planning is the process of organising a visual concept, location, styling, models, poses, lighting, shot requirements and schedule around a garment collection. It helps the photographer and creative team understand what the images need to communicate. Strong planning also ensures the shoot produces clear garment records, detail photographs and creative frames for the student’s intended portfolio or presentation.
2. What should students include in a fashion-shoot mood board?
A mood board may include the garment collection, colour palette, location, lighting, poses, model expressions, hair, makeup, accessories, texture and editing direction. Every image should explain the same concept. Students should label references when their purpose is unclear and remove attractive images that do not support the collection. A focused mood board provides better direction than a large collection of unrelated photographs.
3. Is a studio or outdoor location better for garment collection photography?
Neither option is always better. A studio offers greater control over the background and lighting, while a location can add atmosphere and context. The correct choice depends on the collection, image purpose, budget, weather, permissions and practical needs. Students should check whether the setting supports the garments and whether the team can manage changing, storage, lighting and safety at the location.
4. What photographs should a student designer capture?
A student should capture full-length front, side and back views, along with three-quarter, movement and close-up detail photographs. A collection group image can show how the looks connect. Creative editorial frames and behind-the-scenes images may also support the portfolio. The final shot list should reflect the garment features, collection story and intended use of the photographs.
5. How should poses be chosen for fashion photographs?
Poses should reveal the garment’s silhouette, construction, movement and details. Structured clothing may suit controlled poses, while flowing garments may benefit from walking or turning. Important sleeves, back details or embroidery should remain visible. Pose references can guide the model, but the team should adapt them to the actual garment instead of copying a position that hides its strongest feature.
6. Why is a fitting necessary before a student designer photoshoot?
A fitting helps the team check garment balance, closures, hemlines, comfort and movement. It also allows the stylist to test footwear and accessories while the model understands the outfit. Photographs often make fitting problems more noticeable, so corrections should be completed before the shoot where possible. A fitting also reduces delays caused by avoidable alterations on the shoot day.
7. How can students maintain consistency across collection photographs?
Students can maintain consistency through a shared background, lighting direction, colour treatment, framing, styling and model attitude. Individual looks may use different poses, but the overall mood should remain connected. The team should compare images during the shoot and correct major changes in brightness, colour or composition. Consistent file editing and selection also help the collection appear unified.
8. Does ISFT’s postgraduate fashion programme include styling and photography?
Yes. Fashion Styling & Photography is included in Semester 2 of ISFT’s Post Graduate Diploma in Fashion Design & Technology. The programme also covers garment construction, textiles, illustration, draping, merchandising, CAD and portfolio development. Applicants should review the current course page and contact the ISFT admissions team for complete information about eligibility, duration, specialisation and the admission process.
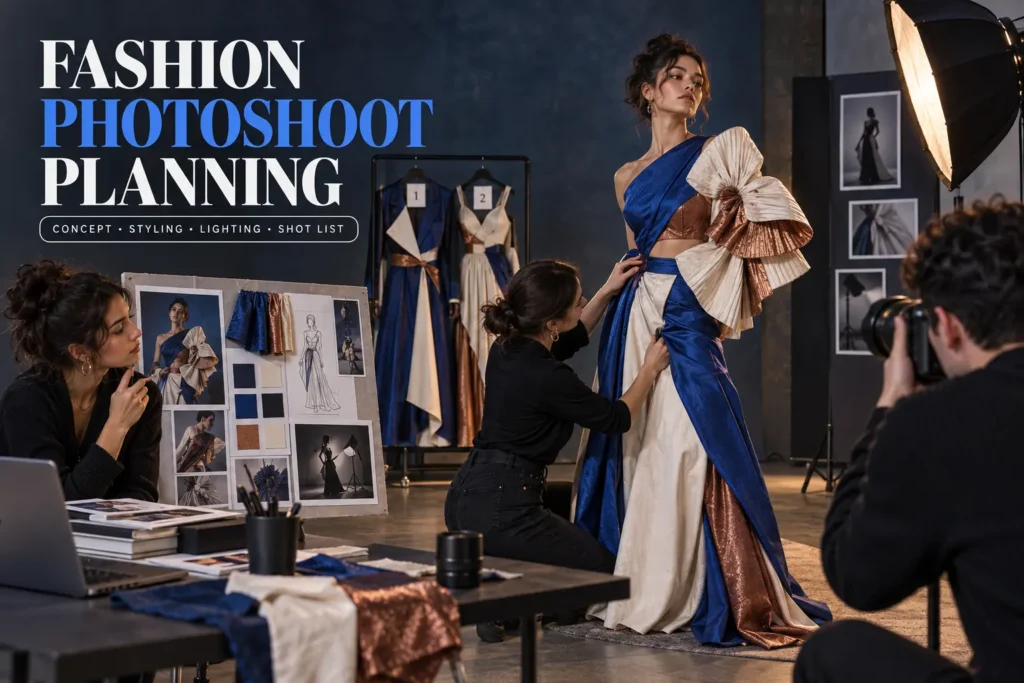
Table Of Content
- What Is Fashion Photoshoot Planning?
- Start by Understanding the Garment Collection
- How Does Fashion Shoot Concept Planning Begin?
- Planning Garment Collection Photography
- Creating a Shot List
- Team Roles During a Student Designer Photoshoot
- Directing the Model During the Shoot
- Maintaining Visual Consistency Across the Collection
- Common Fashion Photoshoot Planning Mistakes
- Reviewing and Selecting Final Images
- Watch a Fashion Photoshoot Come Together
